My Top Tips for sound design with synthesisers.
So we’ve all been there. Thought to ourselves “ah i love that hit sound, or i love that woosh riser… but how do i make it?”
well in this short post im going to go through the basics of what to start fiddling with when you open your synth. but first im going to put some taboos to rest, yes thats right, theres a lot of them when it comes to synths inside your DAW.
- it doesn’t matter what synth you use!
Every synth will have its own flavour, a sectret sound thats each patch has because of the developers algorithms, this is true… but essentially you can make any sound that you want from nearly any synth that has the parameters I’m going to talk about, and there arent many that dont have these parameters.
- You cant use presets in your sound design - not true!
This simply isnt true, if you find a preset that gets you the majority of the way there then use it! these tips will help you understand what parameters you need to approach to change the sound in the way you wnat it changing.
- “But Geoff, theres lots of differnt types of synths, wavetable, FM, additive, subtractive etc, dont they all work differnetly?”
The answer is yes, they do all work differently and the only one id say that is so different that it causes confusion is additive synthesis… So if you have an additive synth I would experiment on it but don’t expect everything to work because often you add a sound and it will effect the signal in a completely different way than you thought it would.
Ok, heres for my top tips
Note You will notice that I’m using Massive to Demo what these look like as Massive is the mst unviersal layout that other synthesisers
- Ocilators - essentially this is where the sound comes from. Oscilators create what we know as wavetables. these wavetables can be a really simple sound such as a sine wave which sounds very smooth, or they can sound really complicated. generally the main ones to be aware of are Sine, Saw, Triangle and Square… youll probably have a lot of differnt one which you can play with so just have fun. sine waves are smooth, Saw waves are Buzzy and clipped sounding… the rest is a variant of these on a scale so to speak. in your oscillator you might have a wavetable position knob, this just helps you fine tune the sound by picking a position within the wavetable that you are happy with.
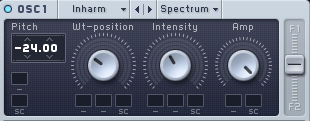
consider the octave that you are making your sounds in. the more octaves you have the broader your sound will be at the end. more octaves beefen up the sound. so if oscilator one is playing in C1 range you can pick a different octave for the other oscilators… later you can cut out frequencies you dont want in your filter.
-
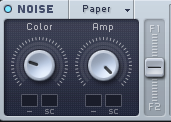
Noise Generator - This is self explanitory but id suggest you use it to thicken your sounds… or use it on its own for risers. we will come back to this later on in another tip.
-
Filters - Think of these as the hi cut and low cuts in your EQ. at their basic level this is essentially what they do, though you can start to cut out specific bandwidths within the signal too, which will give you different sounds. this is simply another level of detail that youll use to hone in to a sound youve created with your oscillators. for example, if you want a low sine wave use a low pass filter to cut out the highs that you don’t want.

-
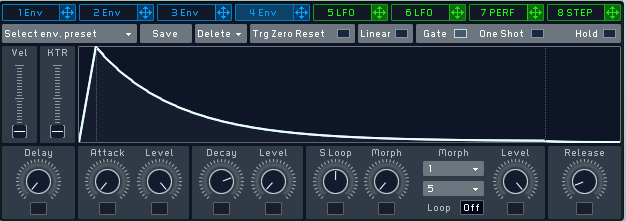
ADSR (envelope) - Now that you’ve sorted out exactly what type of sound you want you can focus on how long the sound plays for, and in what way it is played. in the ADSR youll be able to change the attack, how long the note holds for (sustain), and the release. some synths have different names for this but if this is what its doing then essentially this is what it is. examples to help you -
A fast attack will give you the note straight away, the slower the attack the longer it will take for the note to reach full velocity. really slow attacks with a fast release are the foundations of making risers.
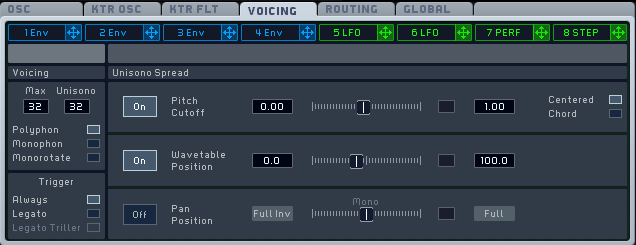
- Voices and tuning - The more voices you have (in unison) the bigger the sound. so if you had 16 voices in unison you’ll end up with a very big sound, this sint always what you want, but can be useful. to help distinguish these extra voices use the detune option if your Synth has it, most do have it so you should have no trouble with this. be sparing on your amount of detuning, only use enough to hear the separate voices for tonal stufff. if you are making a kick or snare then you can use as much as you like.
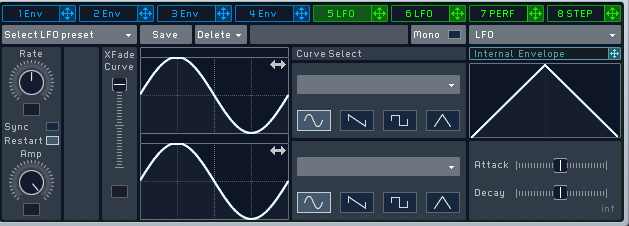
*LFO’s - This stands for “Low Frequency Oscillation”. to use this effectively you often need to assign it to another parameter within your synth, usually the oscillator, this will morph your sound source using other wavetables so that you get variation over time. in this step you make the patch sound musical. remember that the rate knob within the LFO is responsible for how long it takes the LFO to modulate the sound. typically a slower rate works best… the faster the rate the more the sound will sound like a tremolo (which can also be a cool effect on one of your voices.
These are all of the main aspects of your synth. You’ll have other parameters such as effects and maybe even a wavetable modulator, but all of these are at the core of what you’ll need to start making your own custom sounds.

I hope that this is useful for you, I’m very excited to hear how you get on with your own sounds!


 coming down fast on to your tummy and their would be some amount of quick release as your fist bounces back until it rest on your stomach